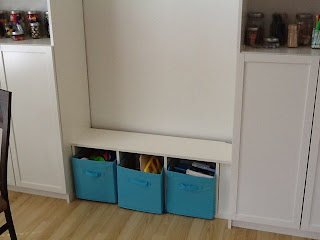
We bought the three bookshelves for the front room and put the smallest one on it's side to make a bench.
I knew I could make a bench cover, so it was just a matter of finding the fabric I wanted and then waiting for the green foam to go on sale. For some reason that stuff is SO pricey!
**TIP: to save money, buy one inch foam then double it up. It is half the price of the two inch foam and they only cut it length wise. So I would have had a bunch left over because I had to buy it as wide as it was sold--which was 24 inches, which was exactly double what I needed, so it worked out perfectly.
I started by measuring the bench size. It is 42" long and the depth from the wall to the front of the bench was 12" (there is about an inch gap between the back of the bench and the wall, but I wanted that covered with the cushion, so I included that in the measurement.)
 |
| 42" x 24" piece of 1 inch foam from JoAnn Fabric |
Brent was working from home this day, so he helped me cut:)
 |
| Cut it straight down the middle then shaved a bit off each side so it wasn't too tight when the fabric was added. ***TIP: USE AN ELECTRIC KNIFE! |
 |
| Two pieces of foam-- 42"x12" each |
Figuring out how I want to cut the fabric
Cut the fabric for the top and bottom. Two pieces the exact same.
 |
| each piece was 15" by 45" for seam allowance. |
Pin the pieces ugly side together
Sew around the edges. I decided it would be easier to feed the foam in in the center rather than in one of the ends.
Then I cut the corners for a nice fold.
Turn right-side in and feed the foam in.
 |
| The first piece slid in real easy. The second piece was much harder because it doesn't slide against the other foam. But eventually it got in there. |
Pin the opening shut. At this point I was still very happy with the way the project was looking and with my plan, since I didn't follow a tutorial.
Every project I make has some sort of "that's how you know it's homemade" look to it:)
As I was sewing the seam shut (with the foam already stuffed in) it was just so big and hard to manage that the cushion slipped away in the middle. So my seam got a little messed up...one side is folded under, but the other is not! It is still sewn shut so it won't come open, but from the one side it looks a little sloppy. It's only this section, and since it is for a child's bench, I wasn't too concerned:)
The finished product!
The sloppy side is in the back, so you can't even see it.
And my little model trying it out
 |
| She would make anything look good, don't you think? :) |


Turned out great!!
ReplyDelete